Oct 2, 2014

{ Adobe Kuler }

Number three on my Top Ten List for Designer Resources on the Web is Adobe Kuler. Adobe Kuler is an Internet application that lets you create individual color schemes with various colors. Much like any color wheel Adobe Kuler has the possibility to create thousands of color combinations. Adobe Kuler is a easy website to pick up. One of the best features on Adobe Kuler is the ability to create a color scheme from any photograph. All you have to do is upload an image on the website and it will find five colors that it believes look good with each other. Once you have created a color scheme that you enjoy you then can save that scheme and it will be kept in your color themes. Since this website is created by Adobe it's a reliable color source. I would suggest Adobe Kuler to anyone who loves mixing colors and creating color schemes to use in designs.

Below I have shared the link to Adobe Kuler, along with some photos from Adobe Kuler that may help you better understand Adobe Kuler and what it has to offer.

{ Adobe Kuler Link }


This is what the homepage for Adobe Kuler looks like. Here you can pick from what kind of color scheme your looking for. For example this photo is showing an Analogous color scheme. You have the option to change the colors the wheel had selected. If you like the color scheme you can then save it into your color themes.


 This is what the explore page looks like. It shows you the most popular color scheme, or even random schemes. If you find one you like you can then save it into your themes. 


This is what happens when you upload your own images. It tries to find a color scheme from your image. You can pick the color mood you want Adobe Kuler to pick up on, for example this one is showing a colorful color mood. Once you have a color scheme that you like you 
can save it into your themes. 


Happy Coloring!!!

{ Behance }

Number two on my Top Ten List for Designer Resources on the Web is Behance. Behance is a social media website that connects artist and designer from all around the world. Behance can best be described as a online portfolio, it allows you to showcase your work and get feedback from other artist, some as far away as China. On Behane it's all about self promotion, companies as big as LinkedIn, AIGA, Adweek, and numerous others have the ability to check out your work and comment on it. Since Behance is owned by Adobe it's a pretty well recognized website. I highly suggest Behance to any designer or artist because its a great site to find out what other people are creating. If you find someones work that you like you can appreciate it and even follow that persons page and get updates from them. This is the perfect website for anyone who wants to connect with like minded people and share their passions.

Below I have shared my Behance information so that you can follow me and possible appreciate my work. I also posted some photos from Behance for those of you who aren't really that familiar with Behance and what it has to offer.

{ Rachel Rising Behance Link }


This is what the homepage looks like when you first log in to Behance. It will show work from the people you follow and the work that is trending on the site.


This is what your portfolio page would look like, it shows your work and how many people have viewed your projects, appreciation your work, and whose following you.


This is what your work pages look like. It gives a more in depth look at what you have to offer. It can go more in depth as what your project is and how many have people liked it. 

Happy Sharing!!!

Oct 1, 2014

{ Pinterest }

In my last post I mention a Top Ten List for Designer Resources on the Web. I thought for the next couple of post that I would take a more in depth look at each of my top ten, Number one on my list that  I use as a resource on the world wide web is Pinterest. Pinterest is a great resource for a designer or anyone who loves to explore things on the web. It allows you to look at what other people have posted in hundred of different categories. Some of my favorites to look though are design, art, DIY & Crafts, and photography. These are all really great to look at to spark ideas. The best part about Pinterest is that it allows you to bookmark and  categorize what you're looking at on your boards. You can have numerous boards for all of your passions. My Pinterest has 12 boards all for different aspects of my life, such as a Craft board , Design board, Cooking board, and even a Color scheme board. Pinterest is something I would suggest to any designer, artist or anyone who loves getting ideas from others.

Below I have shared my Pinterest information so that you can follow me. I also posted a couple of photos from Pinterest because I thought for those of you aren't that familiar with Pinterest it could help you better understand everything Pinterest has to offer. 

{Rachel Rising Pinterest Link }


 This is what your page would look like, with your numerous boards and pins


This is what it would look when you search for something, it this instants I was looking up design.It's always good to remember that content on Pinterest is always changing so no search will every be the same as the last. 

Happy Pinning and Posting!!!


{Top Ten List for Designer Resources on the Web }

For a class assignment we had to create a top ten list of anything that could relate back to our blogs. Since this blog is about design I decided to share my top ten websites to use when it comes to finding design resources on the web. In the next couple of days I'll go more in depth on each of my top tens. I've linked each designer resource for easy access and to give you a chance to check them out yourself.For now here is my top ten list. Hope this can be just as helpful for you as it's to me.

{Top Ten List for Designer Resources on the Web }

{1}  Pinterest – social media site used for bookmarking

{2}  Behance -  social media site used for connecting with other designers around the world

{3}  Adobe Kuler- used for everything color related. Helpful for creating color pallets

{4}  Fontshop- a blog connecting font lovers from around the world

{5}  Font in Use – used to help identify typefaces

{6}  Awwwards – award site for designers and web developers

{7}  The Design Encyclopedia – references material for designers

{8}  Typophile – font identify website. Helps connect experts in type with other designers around the world

{9}  Font Squirrel- font downloading website

{10} Ad Club of Buffalo- helps connect designers with other designers in their area. Can be used or job searches also.

Sep 27, 2014

{ MOO Printing }

A few post ago I was talking about how I was in the process in creating a new business card for myself. Well good news I ordered them yesterday and I must say the whole process was a lot easier then I could have ever imagined. All because of MOO.com an online printing company that specializes in business cards. They made the whole process simple and very easy. With there website you have the ability to submit your own designs to create your cards or use any of the numerous templates they have available. They have numerous styles of paper to choice from and you have the choice to choose between glossy and matte cards. They even emailed me a proof layout of my cards to make sure it's what I wanted. The website has even send me numerous emails reminding me of my order. I would highly suggest this website to all of my friends, graphic designers or not. The website is http://us.moo.com/ and they are having a sale till September 30th, so if I was you I would get my orders in before it's to late.  Below I added some of the guidelines to ordering at MOO.com and what you have to follow to make your design fit there templates.


{ If Logo Told the Truth }

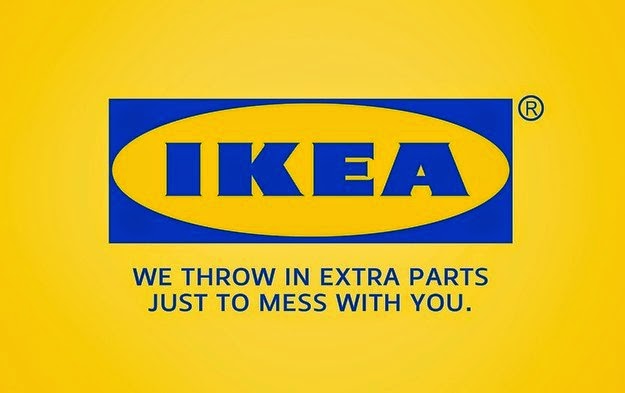
It may not come as any surprise from some of my posts but I'm a fan of the social media website Buzzfeed. In the last couple of months they have been posting numerous things that relate to graphic design and advertising, two of my passions. One of the funniest and most relatable things they have posted was something that calls out companies and there logos. It may not come as a surprise but many logo have been know to stretch the truth or even make consumers question the product. A designer took it in his own hands to show what logos should say, some of the redesigned logo are humerus, where others really get you thinking. Below I have posted some of the best of the truthful logos.


Buzzfeed even decided to join in on the fun by creating one about themselves. 


{ DYI String Art }

Beside graphic design I have a love for DIY crafting as well. Back in January I came across a crafting trend taking over Pinterest. This art form perfectly combines my love of the fine arts and of graphic design it's called DIY String Art. To create string art is simple. All you need are tacks or some kind of nail, a board, string or thread, and a way to trace your wording or image on the board. From their you trace the image or wording on the board, nail or stick the nails in the board following the tracing. The next step is were it gets hard, the easy way to describe it is to show the steps. From this point on I'll be explaining the DIY String Art process in photo form.

Step # 1 - Print out a tracing of your word, you can do this by either printing it out or projected the image or wording on to the board .


Step # 2 -  Once you have the tracing placed on your board, begin placing your pins or nails along the outline of your word or image. Be careful placing the pins and make sure to stay on the tracing line. It may help if you create a series of dots on the lines to make sure you stay on track.


 Step # 3 - Your next step is to begin adding the string onto the pins or the nails. The best way is to do so in a criss cross like pattern, starting at the corner and working down. This is the longest part of the process and can be very time consuming.


Step # 4 - Continue with adding the string in a criss cross pattern. Once you have finished one thing of string tie a knot on the last pin and continue. You'll keep doing this till the end.


Step # 5 - At this point you should be finished with the string process. All of the ends of the strings should be left, you'll tie them again around the pins and tie a knot making sure that it's tight. Once you've done that you will cut the ends, and be finished.


Step # 6 - Pat your self on the back because you have just finished your String Art project. Your project should look simliar to the one below. If you really want your project to pop you can add black string around the outline.


Hope this was helpful and I would love to see what you guys create. Feel free to post it on the blog.